The Clients page lists everyone you work with, with their projects, their next visit and what they have paid. Open any client to see their full profile, email them, add private notes or start a new project. Clients who book you online are added automatically.
This article covers the Clients page, adding and importing clients, the client profile, emailing clients, text messages and archiving.
Where to find it: Click Clients in the left menu. On a phone, tap the menu icon at the top left first to open the menu.
In this article
- The Clients page
- Find a client
- Add a client
- Import clients from a CSV file
- The client profile
- Email a client
- Text messages (SMS)
- Private notes
- Archive or restore a client
- Inbound leads
- Troubleshooting
- Related articles
The Clients page
At the top, four tiles give you a quick view. Click one to show those clients:
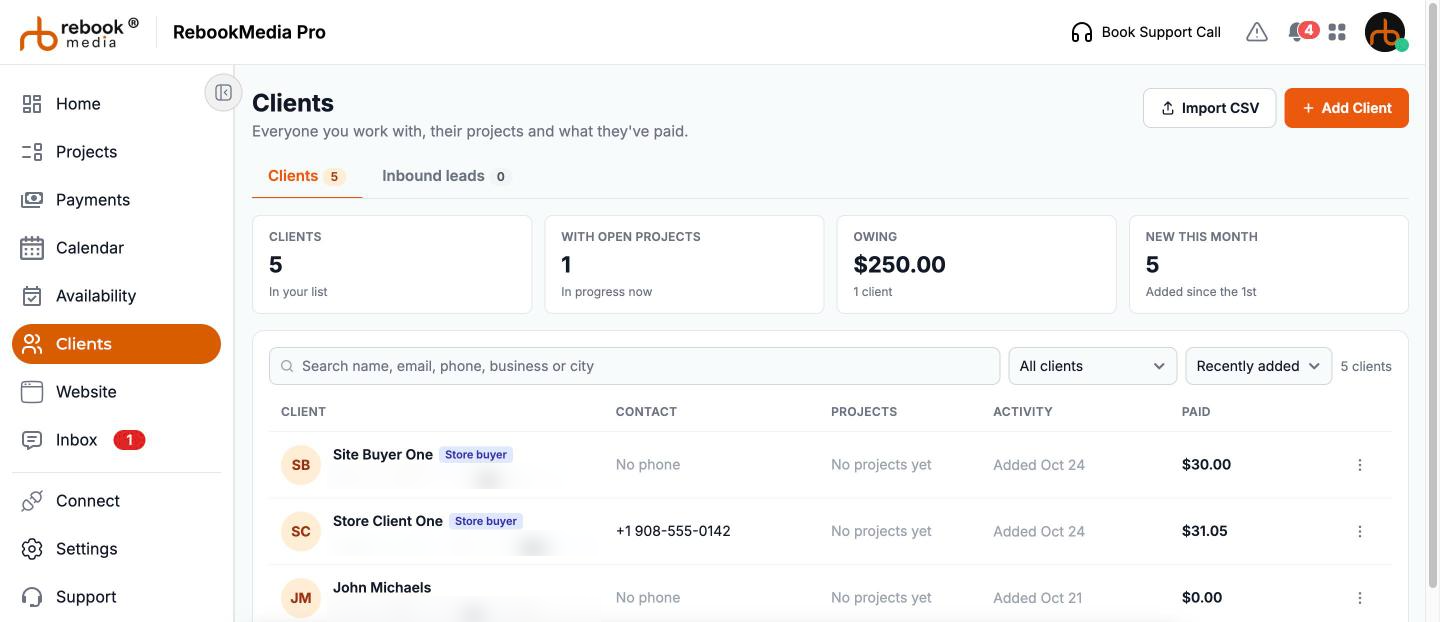
- Clients: how many clients are in your list.
- With open projects: clients with a project in progress.
- Owing: the total your clients still owe, and how many owe it.
- New this month: clients added since the 1st.
Below, each row shows:
- Client: photo or initials, name and email. A Website lead tag means they first contacted you through your website or profile.
- Contact: phone number, an SMS on or Texts off tag, and their business or city.
- Projects: how many projects they have, and how many are open.
- Activity: their next visit, or when their last project was.
- Paid: what they have paid you (after refunds), and anything still due in red.
Click a row to open the client's profile, or use the ... menu to Edit, Send email or Archive. On a phone, each client is shown as a card.
Find a client
- Search: type a name, email, phone number, business or city.
- Show: All clients, With open projects, Owing, No projects yet, New this month, SMS on, or Archived.
- Sort: Recently added, Name A-Z, Latest activity, Total paid or Balance due.
The list shows 50 clients at a time; click Show more for the next 50.
Add a client
- Click Add Client.
- Enter their First Name and Email (required), and their last name.
- Add their Phone Number as 10 digits, for example 908-555-1212. Tick Enable SMS only if they have agreed to receive text messages.
- Optionally add a photo (JPG or PNG), their business, time zone and address.
- Click Add Client. You will see "Client registered successfully."
Good to know: adding a client emails them an invitation to their free client account ("Welcome to [your business]" or "You've been added as a client on [your business]"), where they can see their projects, pay invoices and download photos. See Your client account.
Import clients from a CSV file
- Click Import CSV.
- Upload a CSV file with these columns, in this order, and a header row: first name, last name, email, country code, phone, business, notes.
- Check the clients listed under Parsed Users, and click Remove on any you don't want.
- Click Proceed.
Rows without a first name, last name and valid email are skipped, and so are people already in your list. Imported clients aren't emailed and don't have SMS turned on; edit a client to turn it on once they agree.
The client profile
Click a client to open their profile:
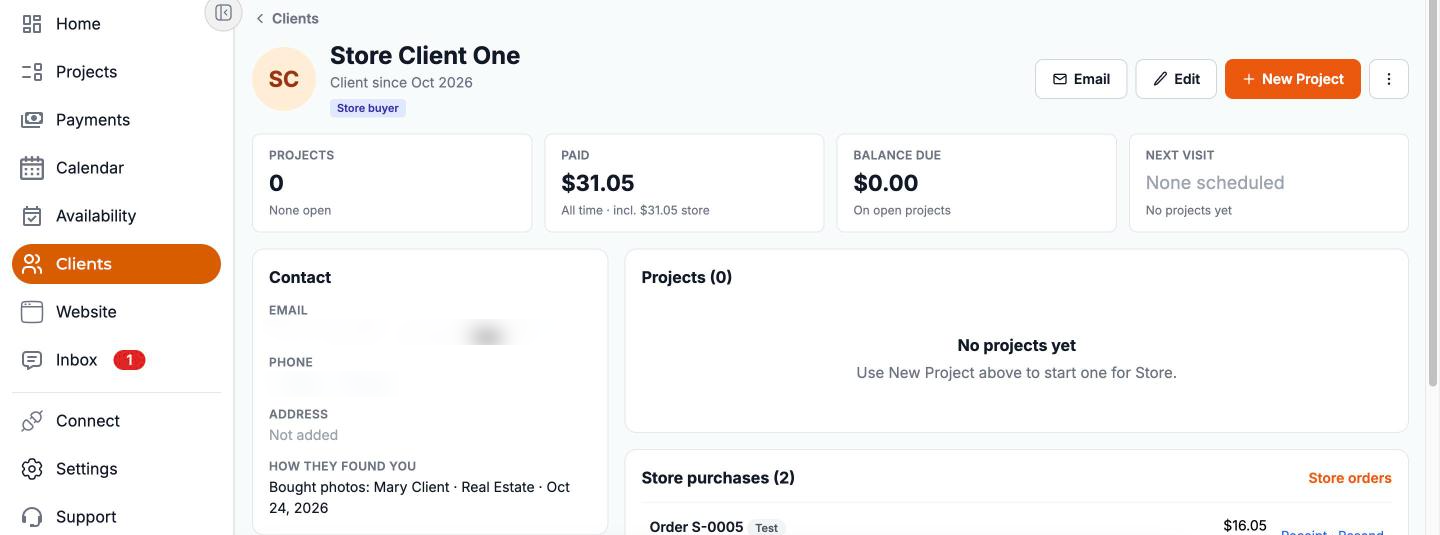
- Header: their name, business, when they became a client and their tags, with Email, Edit and New Project buttons.
- Tiles: their projects, what they have paid, any balance due and their next visit.
- Contact: email, phone, address and How they found you (for example, the contact form on your website).
- Notes: your private notes about them (see below).
- Messages before they became a client: what they sent you as a lead.
- Projects: every project you have done for them, with the next visit, payment and status. Click Open in Projects to see them on the Projects page.
Click New Project on a profile to start a project with this client already added.
Email a client
- Click Email on their profile, or Send email in the row's ... menu.
- Write a subject and message. Use Tokens to add their name or your business name, and Templates to use a saved Client Email template.
- Attach up to 5 files (10 MB in total) if needed.
- Click Send Email. The email comes from your business name.
Tick Save as my template to reuse your message, and set a default Client Email template in Settings > Templates (see Use templates for emails and contracts).
Text messages (SMS)
Tick Enable SMS (in Add Client or Edit Client) once a client agrees to receive texts. You can then text them invoices and invoice reminders (see Send invoices and get paid).
- Clients with texts turned on show an SMS on tag.
- If a client replies STOP, texts to them stop and they show Texts off. Only turn SMS back on if they ask to get texts again.
Private notes
- On the client's profile, click + in Notes.
- Enter a title and your note (up to 1,500 characters), for example their preferences or access details.
- Click Save Note.
Only you can see notes. Click View / edit to change a note, or Delete to remove it. Notes are available once the client has a RebookMedia account.
Archive or restore a client
Archiving removes a client from your list without losing anything: their projects, invoices, payments and messages stay as they are.
- Click Archive in the row's ... menu (or Archive client on their profile).
- Confirm. You will see "Client archived."
To bring a client back, choose Archived in the Show filter and click Restore. Clients can't be deleted.
Inbound leads
The Inbound leads tab lists people who contacted you through your website or profile but haven't become clients yet. See Manage your leads.
Troubleshooting
"This client is already associated with your account."
They are already in your list. Search for them.
"This client is archived. Choose Archived in the Clients filter to restore them."
Restore them from the Archived filter instead of adding them again.
"Enter a 10-digit phone number, like 908-555-1212."
Enter the number without the country code, as 10 digits.
Send email is greyed out
The client has no email address. Edit the client to add one.
A client isn't in my list
Check the Show filter is set to All clients, clear the search, and look under Archived.
Still stuck? Book a free 30-minute call with our support team and we will walk through it with you.