When your photos are ready, your professional shares them in an online gallery. You can browse them full screen, zoom in, pick your favorites, download them and share them with family, friends or your agent.
Where to find it: Open the email "Photos for [your name] are ready" and click View Photos, or use the gallery link your professional sent you. Your photos are also on your project page: sign in, open Projects and click the project.
In this article
- Open your gallery
- Browse your photos
- Pick your favorites
- Download your photos
- Share your gallery
- Download from your account
- Troubleshooting
- Related articles
Open your gallery
Your professional sends you a link to your gallery by email, or shares it with you directly. You don't need to sign in to view it.

- If the gallery is password protected, enter the password your professional gave you and click View Collection. If you don't have it, ask your professional.
- The gallery opens on a cover photo. Click View Gallery to scroll to your photos.
- If your professional organized your photos into folders (for example Ceremony and Reception), use the tabs to switch between them.
Browse your photos
- Scroll down to see your photos. Videos have their own section, and real estate projects can also include Floor Plans and Other Attachments.
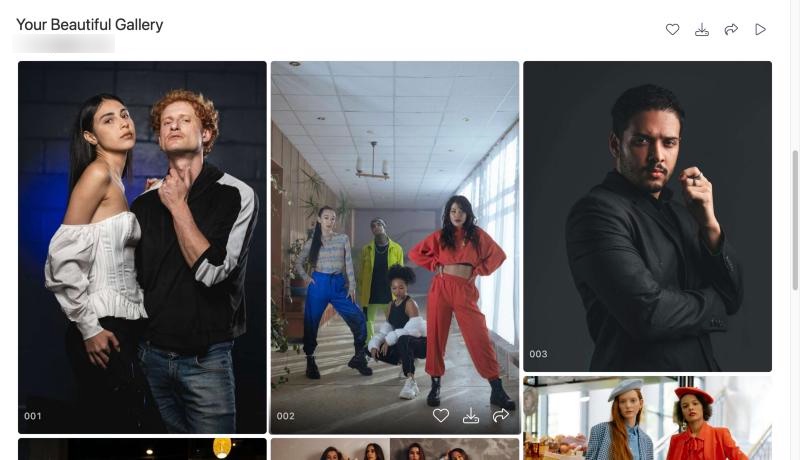
- Each photo has a number, such as 007. Use it when you ask your professional about a particular photo.
- Click a photo to open it full screen. Use the arrows or your keyboard's arrow keys to move between photos (swipe on a phone), and Esc or the X to close.
- Zoom: use the zoom buttons, double-click (double-tap on a phone) or pinch to zoom in.
- Photos: show or hide a strip of thumbnails at the bottom to jump to any photo.
- Click the play icon at the top to watch a slideshow. Tap the photo or press the space bar to pause.
Pick your favorites
If your professional allows it, click the heart on any photo to add it to your favorites, for example to choose photos for prints or an album.
- The first time, enter your Email and click Send code.
- Check your email for "Your sign-in code", enter the 6-digit Code and click Sign in. The code works for 10 minutes. If you are already signed in to RebookMedia, you skip this.
- Click hearts to add or remove photos ("Added to favorite").
- Click the heart at the top of the page to see all your favorites. From there you can download or share just your favorites.
Your favorites are saved, so you can come back to them anytime. Your professional can see which photos you picked.
Download your photos
- One photo: click the download icon on the photo, or in the full-screen viewer.
- All photos: click the download icon at the top. If the gallery has folders, choose one folder or Download everything. Your photos are prepared as one ZIP file.
- Your favorites: open your favorites and click the download icon there.

On a phone
Downloads save straight to your Photos app: tap Save to Photos and choose Save in your phone's share options. For many photos, they are saved in groups (for example "Save photos 1-20"). Scroll to the bottom of the gallery first so every photo has loaded, or tap Download as ZIP instead.
Good to know: if your professional has added a watermark to some photos, those download one at a time with the watermark and aren't included in the ZIP. Ask your professional about removing it, for example once your invoice is paid.
Share your gallery
If your professional allows it, click the share icon to share a link to your gallery. On a phone your share options open, so you can send it by text, email or social apps. On a computer, copy the link from your browser's address bar if sharing isn't available.
Download from your account
- Sign in and open Projects, then click the project.
- Your photos and files are under Photos & Videos (and Floor Plans and Attachments when there are any). Click a photo to open it full screen.
- Click the download icon on any photo, or click Select, choose photos (or Select All) and click Download. Download All downloads everything.
On a computer, several files are prepared as a ZIP and the download starts by itself. On a phone, they save to your Photos. Files are available in your account for 30 days after your project is completed, so download them soon. Your gallery link keeps working after that.
Troubleshooting
"Invalid password." or "Too many wrong passwords."
Check the password your professional sent you. After too many wrong tries, wait 15 minutes and try again.
"That code is not right." or "That code has expired."
Use the newest code we emailed you, within 10 minutes, or click Send a new code.
"Downloads are turned off for this gallery."
Your professional hasn't turned on downloads. Ask them if you need the files.
"No non-watermarked media found to download"
All the photos in this gallery are watermarked. Download them one at a time, or ask your professional to remove the watermark.
Not all my photos are in the download
Watermarked photos aren't included. On a phone, scroll to the bottom of the gallery first, or use Download as ZIP instead.
A photo shows "Protected preview, Being prepared"
Your professional's gallery is still being prepared. Check again in a few minutes.
"Order Expired"
Files in your account are available for 30 days after completion. Use your gallery link, or message your professional.
Still need help? For anything about your booking, photos or invoices, message your professional from your account's Inbox. For help with your RebookMedia account, email support@rebookmedia.com.